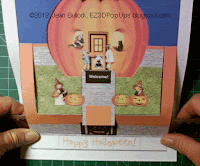
Halloween Pumpkin House Folding Tutorial by EZ3D PopUps
Here is the "picture" version of the Halloween Pumpkin House folding tutorial. Please see the previous post for the template.
Start at the bottom of the card.
 |
| 1. Valley Fold the wall forward. You can use a ruler to help you. |
 |
| 2. Mountain fold the top of the wall (backwards.) |
 |
| 3. Rotate the card and set it down on the sky part of the card. Valley fold the white strips forward. |
 |
| 4. Valley fold the orange strips forward. |
 |
| Close the card. |
 |
| Smooth the creases. |
 |
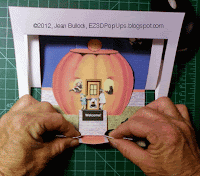
| 5. Lift the witch and pumpkins so they stick up away from the grass and bend the dotted line slightly. |
 |
| 6. Put your fingers behind the welcome mat, push it to a 90° angle. |
 |
| 7. Lift the little pumpkin up slightly then grasp the pumpkin house with fingers and thumbs and pull it toward you until the roof and little pumpkin lies flat. |
 |
| 8. Rotate the card, slip your fingers behind the witches and pumpkins, and thumbs under the grassy area, squeeze together, moving to the center of orange sidewalk. |
 |
| 9. Rotate again. Bend the wall/grass forward to crease the line. |
 |
| 10. Pinch to crease the line of the grass and bottom of pumpkin on each side. |
 |
| 11. Close card by the edges. The little roof pumpkin will pop up as you pull the card edge down. Pull the pumpkin house forward again and press the back of the sidewalk tab down. |
 |
| 12. Hold down and smooth all the folds. |
 |
| 13. Turn over and smooth again |
 |
| 14. Put your thumb on the sidewalk and your forefinger on the orange sidewalk and open the card to 90°. |
 |
| You are now ready to attach it to the outer card. For gluing instructions, go to http://ez3dpopups.blogspot.com/2012/10/pumpkin-house-halloween-card-gluing.html |
